Showing posts with label tape mani. Show all posts

Monday, January 7, 2013

Bob Marley/Jamaica Themed!


 I FINALLY got a new phone so I can take and upload high-quality photos of my work now!
Here are some Bob Marley/Jamaica nails I did for a contest on Instagram!

There is a peace sign painted over a watermarble, "One Love" over watermarble, Bob Marley's face over a sponge gradient, Jamaican flag tape mani and the Rasta flag/Lion of Judah :)

Polishes used for this mani:
LA Colors Color Craze "Berry Red", Avon Nailwear Pro "Sunshine" and Sinful Colors "Happy Ending".
All of the black details are  hand painted using black acrylic paint and a paint brush, then topped with Seche Vite topcoat!

Also, I have ran out of ideas for "Tutorial Tuesdays" so please feel free to request a tutorial.
Simple patterns tend to work best for making a tutorial :)

Tuesday, November 13, 2012

Tutorial Tuesday: French Manicure

I've been very busy this week so I chose something simple and practical for this week's Tutorial Tuesday..  
French Manicure!
This French mani will be done in almost the exact same manner as the Half-Moon Mani and will require the use of paper reinforcement stickers.
You can purchase these at any office supply store, and I've even seen them at dollar stores.

How To Choose Colors For This Design:
Any colors your little heart desires!
Just make sure the tip color is opaque enough to cover the base nail color!

Suggested Materials:
ANY brand is fine, listed below are the ones used for this particular mani
- Base coat - Seche Clear
- Fast dry top coat - Seche Vite
- Nail color - LeChat UV gel "Midnight Pearl" with Young Nails "Funkadelic" glitter
- Tip color - Spoiled "Visually Slimming"
- A clean, small paintbrush or cotton swabs, for cleaning the cuticles afterwards (optional)
- Nail polish remover (optional)

Before You Begin Painting Your Design:
These steps are optional, but definitely recommended!
- Put down some paper towels in your work area, in case of any spills.
- Be sure to remove any old nail polish.
- Gently file nails into desired shape and remove any ridges with a buffer.
- Push back cuticles with a cuticle pusher or orange wood stick and trim if desired.
- Apply a base coat to protect from potential staining from color polish; wait for it to dry completely.

Step 1:
Take a circle sticker and stick it to the palm of your hand.  Remove it, and re-stick it 4 or 5 times.  
This is to reduce the stickiness of the tape and makes it much easier to peel off of your nails later on.

 Step 2:
Apply 2 coats of the base color and allow to dry.
You can use any brand of fast-drying top coat to speed up this process.
Don't worry too much about being super neat, you can remove excess polish from your cuticles later.
**It is VERY important to allow all polish to dry before applying the tape over it, otherwise the polish will get stuck to the tape and come off**

Step 3:
Gently  apply the circle stickers.  
Place the top half of the circle near the free edge of the nail, the bottom half of the circle should be over the rest of your nail. (You can click the photo to enlarge & see it better.)
I aimed for approximately 1/6th of my nail. 
You can do more or less, depending on how big you want your French tips to be!
The nail naturally curves, so the sticker might need to be adjusted a bit near the free edge.
*Try to avoid any bubbles near the edges of the tape because the top color could get into the bubble and you'll have to start all over!*

 Step 4:
Beginning at the outermost edge of the circle sticker, paint 1 or 2 coats of the French tip color over the base nail color.
It's better to paint a tiny bit over the sticker this way your edge will be clean.  
You can click the photo to enlarge & see a little better.

 Step 5:
Gently  peel the sticker off once the tip color is mostly dry.
Be very careful not to rip it off too quickly, or the polish could come right off.
Also, be careful if the polish is still very wet on the top of the sticker, it could get onto your base color.
Use a new sticker for each nail, since there will be wet polish on the used ones.

Step 6: 
(Forgot to take a pic sorry!)
If necessary, clean up cuticles using polish remover & a brush.
Top it all off with your favorite top coat.

And there ya go!
Simple & easy French Mani :)

For all past Tutorials click here

Sunday, October 7, 2012

Inspirations

 Sorry it took so long to update, still unpacking everything!!
I don't know where my nail stuff is yet anddd this week's Sunday Social is kinda boring so...

Here are a few photos of friends who were inspired by my tutorials! :)
This one is from one of my best friends, Cassi.  She was inspired by the Half Moon Mani Tutorial.   She did a perfect job recreating the shiny black and matte grey!
 And this one was done by my friend Elyse.  She did this using the Tape Mani Tutorial.  The awesome color combinations were part of her outfit for the Susan G. Komen for the Cure breast cancer walk yesterday in Houston, Texas. 

Thank you so much for sharing these pictures.  I'm really glad you were inspired & I would love to see more nail art from you all!!<3

Wednesday, September 26, 2012

Half-Moon Mani: Round 2

Yesterday's half-moon mani colors were just too... old ladyish for me.
I decided to re-do them this morning.

This time, I opted for a matte graphite color by China Glaze called "Stone Cold" as the half-moon base color. (I reviewed and swatched  it not too long ago)
On the rest of the nail, I used China Glaze "Liquid Leather" which is a very shiny patent leather black.
I also topped off the black with a coat of Seche Vite to make it extra shiny so the matte of the half-moon stands out even more.
I can actually see my reflection in the sleek black shinyness!
I like this look much better.  It's more sultry and modern, but still has a classy vintage appeal.

Tuesday, September 25, 2012

Tutorial Tuesday: Half-Moon Mani

This week's featured tutorial is the half-moon mani.
The half-moon manicure actually was very popular from the 1920's to the 1940's and has recently made a comeback.  Who doesn't love a modern twist on a vintage style!?
This was my first attempt, and even though these colors are so not something I'd typically choose, I'm happy with the outcome.  Very fall-like. 
The half-moon mani is done in a very similar fashion as last week's tape mani, except instead of scotch tape, we will be using the small circle paper-reinforcement stickers.  They can be found at any office supply store.

How To Choose Colors For This Design:
You have a lot of artistic freedom with a half-moon mani, since nothing really has to coordinate.  
You can do similar colors, you can do completely different colors, use the same color but matte and glossy, neons, neutrals, glitters.  In the 1930s & 40s it was very popular to leave the half moon of the nail natural, and only paint the tip. There's lots of options!


Suggested Materials:
ANY brand is fine, listed below are the ones used for this particular mani
- Base coat - Seche Clear
- Top coat - Seche Vite
- Top color - Essie "Sew Psyched"
- Half-moon Base color - Essie "Love and Acceptance"
- Circle paper-reinforcement stickers
- A clean, small paintbrush or cotton swabs, for cleaning the cuticles afterwards (optional)
- Nail polish remover (optional)

Before you begin painting your design:
These steps are optional, but definitely recommended!
• Put down some paper towels on your work area, in case of any spills. 
• Be sure to remove any old nail polish.
• Gently file nails into desired shape and remove any deep ridges with a buffer
• Push back cuticles with a cuticle pusher or orange wood stick and trim if desired.
• To make things easier to find (and because I'm super neurotic) I always set up my polishes in the order that they will be used.
• Apply a base coat to protect from potential staining from color polish; wait for it to dry completely.


Step 1:
Take a circle sticker and stick it to the palm of your hand.  Remove it, and re-stick it 4 or 5 times.  
This is to reduce the stickiness of the tape and makes it much easier to peel off of your nails later on.  


Step 2:
Apply 2 coats of the base color and allow to dry.
If you are using a light and dark color for this mani, try to use the lighter color as the base.  Most light colors tend to be less opaque and will not cover a dark color very well!
Don't worry too much about being super neat, you can remove excess polish from your cuticles later.
**It is VERY important to allow all polish to dry before applying the tape over it, otherwise the polish will get stuck to the tape and come off**


Step 3:
Gently  apply the circle stickers.  
Place the top half of the circle over the bottom of your nail and cuticle, and the bottom half of the circle should be over your finger. (You can click the photo to enlarge & see it better.)
I aimed to cover approximately 1/4th of my nail length. 
You can do more or less, depending on how big you want your half-moons to be!
The nail naturally curves, so the sticker might need to be adjusted a bit near the cuticle.
*Try to avoid any bubbles near the edges of the tape and cuticle, because the top color could get into the bubble and you'll have to start all over!*

Step 4:
Beginning at the outermost edge of the circle sticker, paint 1 or 2 coats of the top color over the base color.
It's better to paint a tiny bit over the sticker this way your edge will be clean.  You can click the photo to enlarge & see a little better.

Step 5:
Gently  peel the tape off once the top color is mostly dry.
Be very careful not to rip it off too quickly, or the polish could come right off.
Also, be careful if the polish is still very wet on the top of the sticker, it could get onto your base color.


Step 6:
This final step is completely optional, but it will really help to achieve a neat & clean looking mani.

You can use either a small paintbrush or cotton swab, dip it in nail polish remover, and use it to remove any excess polish on your cuticles and skin.
Be careful not to use too much remover, otherwise you will risk ruining your design.
If you opt for the brush, be sure to use brushstrokes in the same direction; don't "swish" the brush around because it tends to spread excess polish around rather than remove it.


Finish off with a top coat, and here's the final product!
I feel like a classy lady.
I will definitely be trying other color combinations with this, since it was so easy.

Tuesday, September 18, 2012

Tutorial Tuesday: Tape Manicure (Requested)

I've officially decided that I will have "Tutorial Tuesday" as a regular feature on this blog, so you can learn something new to try with your nails each week :)

This week's Tutorial Tuesday will feature the tape manicure.
Last week my lovely friend & fellow blogger Michele of shortgirllongisland.com requested a tutorial for an easy way to do thick stripes.  In my opinion, the easiest way to achieve thick stripes is by doing a "tape manicure" which means using tape to block off the colors and then painting over it.  
For more intricate designs, some people use blue painter's tape and Exacto knife, but I'm keeping it simple so just regular scotch tape and scissors will do.

How To Choose Colors For This Design:
You have a lot of artistic freedom with a tape mani, since nothing really has to coordinate.  
You can do 2 similar colors, you can do 3 different colors, you can leave your natural nail showing and just paint certain sections, you can do the same color but matte and glossy.  There's lots of options!

Suggested Materials:
ANY brand is fine, listed below are the ones used for this particular mani
- Base coat - Seche Clear
- Top coat - Seche Vite
- Top color - Opi "Glitzerland"
- Base color - Essie "Bikini So Teeny"
- Scotch tape or blue painter's tape
- Small scissors or Exacto knife
- A clean, small paintbrush or cotton swabs, for cleaning the cuticles afterwards (optional)
- Nail polish remover (optional)

Before you begin painting your design:
These steps are optional, but definitely recommended!
• Put down some paper towels on your work area, in case of any spills. 
• Be sure to remove any old nail polish.
• Gently file nails into desired shape and remove any deep ridges with a buffer
• Push back cuticles with a cuticle pusher or orange wood stick and trim if desired.
• To make things easier to find (and because I'm super neurotic) I always set up my polishes in the order that they will be used.
• Apply a base coat to protect from potential staining from color polish; wait for it to dry completely.


Step 1:
Take a piece of tape and stick it to the palm of your hand.  Remove it, and re-stick it 3 or 4 times.  
This is to reduce the stickiness of the tape and makes it much easier to peel off of your nails later on.  
You can also now cut the tape to accommodate your nail length & width.


Step 2:
Cut out your shapes!
Simple shapes work best, so I went with thick stripes & a zig zag just for fun.
Try to cut these as evenly and straight as possible, so your stripes will be uniform in thickness.
You can cut a bunch of pieces just in case they rip, get messed up, etc.
Once they are cut, I like to stick them half way onto the edge of the table, with the end of the tape hanging off.  
This way they won't get lost or stick to each other and will be easier to find. 
Just don't stick it completely on the table or get it stuck to your clothing otherwise it'll be ruined.

Step 3:
Apply 2 coats of the base color and allow to dry.
If you are using a light and dark color for this mani, try to use the lighter color as the base.  Most light colors tend to be less opaque and will not cover a dark color very well!
Don't worry too much about being super neat, you can remove excess polish from your cuticles later.
**It is VERY important to allow all polish to dry before applying the tape over it, otherwise the polish will get stuck to the tape and come off**


Step 4:
Gently  apply your tape strips.  
Try to make sure the space between the tape is about equal to the width of the tape itself, this way your stripes will be nice and even.
The nail naturally curves, so the tape will curve with it.
*Try to avoid any bubbles near the edges of the tape, because the top color could get into the bubble and you'll have to start all over!*

Step 5:
Paint 1 or 2 coats of top color over the entire nail, making sure you have even coverage.
The best way to ensure even coverage is to paint in the same direction as the tape strips (vertical, diagonal, etc)
I chose just 1 top color, but you can use as many as you want.
Each section can be painted a different color if you'd like!

Step 6:
Gently  peel the tape off once the top color is mostly dry.
Be very careful not to rip it off too quickly, or the polish could come right off.
Also, be careful if the polish is still very wet on the top of the tape, it could get onto your base color.
As you can see, I did a different pattern on each nail; horizontal, vertical, diagonal, zig zag and random.
You can definitely re-use the tape strips, if they are still sticky enough and the polish has dried. 
More intricate designs, such as the zig-zag, might rip when it's being peeled off and can not be re-used.

Step 7:
This final step is completely optional, but it will really help to achieve a neat & clean looking mani.

You can use either a small paintbrush or cotton swab, dip it in nail polish remover, and use it to remove any excess polish on your cuticles and skin.
Be careful not to use too much remover, otherwise you will risk ruining your design.
If you opt for the brush, be sure to use brushstrokes in the same direction; don't "swish" the brush around because it tends to spread excess polish around rather than remove it.

After finishing off with a coat of Seche Vite topcoat, here's the final product!
If you'd like to request a nail design for Tutorial Tuesdays please leave a comment and let me know :)

Saturday, September 15, 2012

My First Custom Press-on Nail Sets!

So here are my first 3 sets of custom press-on nails!!
Pretty much did whatever came to mind.
This was my favorite set!! 
Mixed hand painted designs & 3D acrylic bows.. it's actually challenging to come up with 12 different designs using only 4 colors.
Simple zig zag tape mani done using my new China Glaze polishes :)
This one was hard to photograph.  If you click on picture you can see it a bit better.
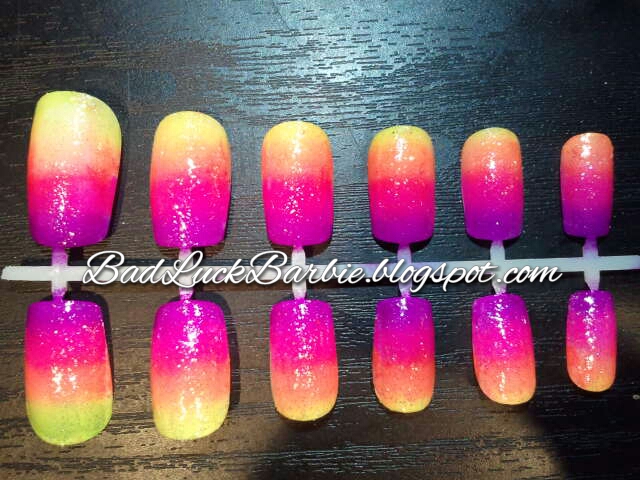
Sponge gradient "ombre" and multicolor glitter topcoat, reminds me of a sunset.


So what's the verdict... Would you be able to look past the stigma of press-on nails and wear one of my custom nail sets?