Showing posts with label glitter. Show all posts

Sunday, December 1, 2013

Laquerlicious Polish Review!

Reviving my blog for swatches & reviews of five fabulous Laquerlicious handmade indie polishes!

Please click on images to enlarge :)
First up we have "Supreme Queen", part of the Laquerlicius shimmer collection.
This is 2 coats, over Essie "Where's My Chauffeur?" and Seche Vite topcoat.
This color is beautiful!  I got many compliments on it.
 Hard to describe - almost like a light grayish blue.  Kinda reminds me of a robin's egg!  
There are tons of beige, royal blue and teal shimmery glitters in a blue-gray base.

Here is "Emerald Glaze", part of the Laquerlicious glaze collection.
This is 2 coats, over OPI "Cuckoo For This Color" and Seche Vite topcoat.
Despite looking very opaque in the bottle, Emerald Glaze is actually quite sheer!
It's jam packed with gorgeous green, teal and purple tiny glitter in a green base.
The purple glitter offers an amazing pop of color against the green/teal.  
I absolutely loved the way this looked on my skin tone :)

This lovely color is "Divine Doll", part of the Laquerlicious shimmer collection.
2 coats, over Essie "Play Date" and Seche Vite topcoat.
I have become a purple addict, so this polish was right up my alley :)
A beautiful shimmery combination of purple, beige and a hint of teal.
This is the perfect polish for anyone who loves a cheerful purple!

This gorgeous glitterbomb is "Bottle of Bubbly", from the Laquerlicious New Year's 2014 collection.
This is one generous coat, over Spoiled "Visually Slimming" and Seche Vite topcoat.
An incredible mixture of silver and gold holo glitters in a clear base.
There are all sorts of shapes & sizes in this polish!
Round, hex, micro, stars and bars just to name a few.
Application of this polish was a dream, didn't really have to dab at all or fish for glitter!
Definitely have plans for this baby as New Years Eve mani.

Last but not least, "Countdown to Midnight", also from Laquerlicious New Year's 2014 collection.
1 generous coat, over China Glaze "Stone Cold" and Seche Vite topcoat.
This glitter bomb is made up of varied sizes of round white, black, pink, purple and teal glitters in a clear base.
This is a super fun, playful polish.  I really enjoy the contrast between all of the colors.
This is the type of polish that would go well with just about any color as a base, so the possibilities are endless!
Application was fairly easy, although I did have to dab and fish a bit, but that doesn't bother me at all.

Final verdict is that these polishes were fantastic.
I fully believe in supporting indie polish makers and really I loved the unique glitter color combinations that Laquerlicious has to offer! 
They dried super quickly, application was a dream and Michelle (IG @creativenailchick) was a pleasure to work with.
I will be using many of these polishes again in the future.
All of the polishes that were reviewed are currently available for purchase at www.Laquerlicious.com :)

Tuesday, March 12, 2013

Mega update! Acrylics & Shellac

Been working a lot at the salon so I don't have much time to do my own nails but here is a mega-update of client's nails I've done :)
Been trying to work on my smile lines (French acrylic)
Pink & White with 3D acrylic bows
Teal  with glitter fade
Did these on myself, pink/purple glitter fade
Black glitter with 3D acrylic bows
Shellac with glitter
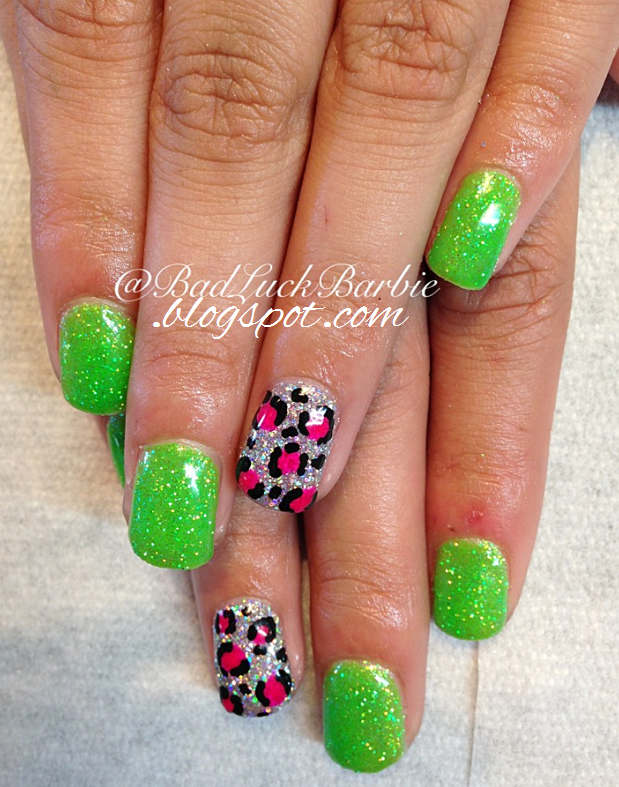
Leopard mani
Shellac with glitter & hand painted leopard
Shellac with glitter accent nails
Gunmetal glitter fade
These are all various UV Gel Polishes (Shellac, Gelish, ManiQ)
with glitters & hand painted designs :)
Enjoy!

Tuesday, January 1, 2013

Happy New Year!

So sorry for my lack of posts, I've been busy with the holidays and also very sick for a few days - I even had to stay home from school :(

Here's a few photos to show what I've been up to recently:

On Christmas Eve I went to visit my best friend's mom who also lives in Florida!

Then, on Christmas Day we drove over to Orlando and went to Universal Studios Islands of Adventure park!
It was awesome, because there is a Dr. Seuss and Harry Potter section of this park :)
 Seuss Landing :)
 Paul standing in huge crowd of people!
I met the Cat in the Hat!
 Hogsmeade

 Ollivander's Wand Shop
 Standing in front of Hogwart's
 Hagrid snowman
 Hogwarts Express train!
 All of the pictures talked and moved, just like in the movies!
 Various stuff from the classroom
 Dragon skeleton from the classroom

The Hogwarts ride was freaking amazing - even though we waited 2 1/2 hours on line!

My mom got me a really cute crock pot slow cooker for Christmas, and I already made chili and pulled chicken in it!


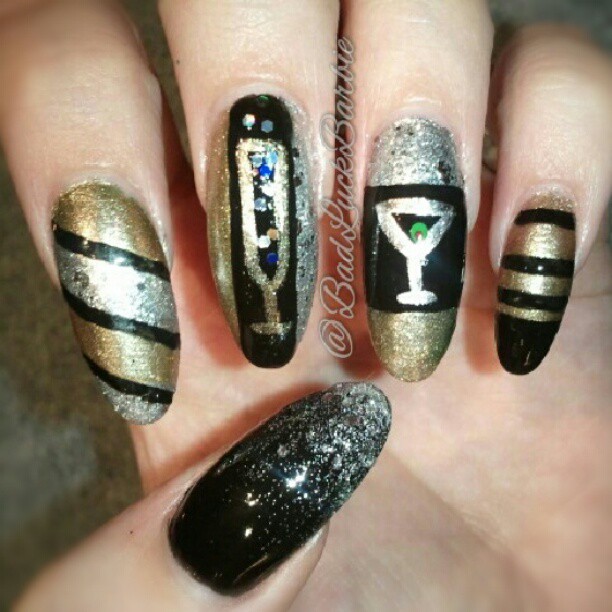
Here is my New Year's Eve design, a glass of champagne and a martini!

How was your holiday/New Years Eve? 
I hope you all had a great time :)

Thursday, December 20, 2012

This week so far! UV Gel & Acrylics.


 Here's what I did in school this week!

We had a representative from professional nail product company Young Nails come to the school and do a demonstration, and I got to be the model!
She gave me a bunch of different Holiday themed nails :)

 Here's a simple holiday mani I did on a class mate.
It's UV gel as a base with Shellac gel polish on top, and on the accent nails I added some encapsulated glitter and hand painted candy cane stripes!

Here is a full set of tips, each nail is a completely different design!  There are various inlays of acrylic including marbles, mylar flakes, glitters and confettis :) 
The shiny stuff on her cuticles is actually just cuticle oil, I always use cuticle oil to help replenish any moisture that might have been lost during the nail service!
Another view!

 This is a sculpted set of stiletto nails.  There were no nail tips used, instead I sculpted the acrylic on a form into the shape that she wanted!  
On the accent nails there are 3D acrylic black roses and hand painted black chevron tips over OPI's "Pink Friday" polish.
Chevron is a style of a French tip, in the shape of a V rather than the classic U shape, and I suggested it to her because I thought it would look very sexy on a stiletto shaped nail!
We also did a variation of "Louboutin" nails, but instead of red bottoms, we went with black bottoms to match the pink & black theme!
I really love these nails!

Sunday, December 9, 2012

Haul, Review & Gradient Swatch: "Love, Charlotte" Polish

A few days ago I got these really awesome nail polishes at a store called Charlotte Russe.
It was very unexpected because Charlotte Russe is known for reasonably priced trendy clothing & shoes.  
I don't shop there, but my friends wanted to see what they had.
I'm glad we stopped in there because I never knew they had their own brand of polish called "Love, Charlotte"!

I was a little hesitant at first, because I figured they would have a really bad formula, but I tested all of them in the store and the application was great and not streaky at all.

The colors don't have names on the bottle but I got a light pink which was "Pastel POP" brand, hot pink, purple, fine silver hologram glitter, large silver holo glitter & a large mixed light & dark purple and silver holo from the "Love, Charlotte" brand.
I decided to do a sponge gradient (click here for a mini-tutorial on sponge gradients)
I used the light pink, dark pink & purple and topped it off with the fine silver holo glitter!
 The sun finally came back out so I got a shot in the sunlight too!

If you live near a Charlotte Russe store, I would totally recommend stopping in to check it out!
They do have some polishes on their website, but there was definitely a better color selection in-store.
They were also on sale in the store but not online!
They were 2 for $3 and I also got an extra 10% off my purchase for giving them my email address, so I got all 6 polishes for around $18. 

Have a wonderful Sunday :)

Saturday, December 8, 2012

Mega Update!

Dearest readers, I have not forgotten about you!
I was very busy this week with school, crafts (you will see these soon!)  and I even had some visitors from back home.

Here is a mega-update for the week, you can click on the photos to enlarge to see the details:
I finally had a chance to finish this acrylic set in school.  I am very pleased with the way it came out!
There are many different types of inlays in this set: marble, glitter, heart & star confetti, polka dots.
Here is a UV Gel set I did with glitter inlay and encapsulated hearts.

 2 of my lovely friends, Debbie & Ayana, drove down from New York to visit!
We went to the beach.
 Stayed long enough to see a nice sunset.
Visited some stores and found the world's cutest pomeranian puppy.  I named him Charlie.
And of course I did their nails!  Here is my first try at a 3D acrylic cupcake on Ayana.
 
 And a hand painted french manicure with Hello Kitty & 3D acrylic bow for Debbie :)

What have you all been up to this week?
Have a wonderful Saturday!

Thursday, November 29, 2012

Learning: Acrylic & Gel Inlays

 Here's a little update on what I've done at school.
The latest things we have learned is called "inlays" or "encapsulating".
This can be done with UV gel or acrylic.
The trick is to work with very thin layers & creating a base, color, an item to be encapsulated, and then a clear layer over the top to seal it in.
You can encapsulate almost anything: glitter, confetti, lace, googly eyes, candy wrappers, feathers, etc.!
Here are some encapsulations or inlays I've done on classmates.

 This encapsulated glitter was done with UV gel and a brush. 
UV gel is a bit different than gel polish, it's VERY sticky and can be a lot messier!
 Here are some acrylic inlays, done on the end of a French tip and some fades as well.
4 different glitters, acrylic polka dots, heart & star confetti and marblized acrylic!
Here's another view of the acrylic.. and some palm trees in the back haha (so difficult to get a good photo of these nails!)